Migration Custom Source Plugin

In November 2022 the Drupal community and the Drupal Security Team will end their support for Drupal 7. By that time, all Drupal websites will need to be on Drupal 8 to continue receiving updates and security fixes from the community. The jump from Drupal 7 to 8 is a tricky migration, often requiring complex data transformations to fit legacy content into Drupal’s new paradigm. If you are new to Drupal migrations, you can read the official Drupal Migrate API, follow Mauricio Dinarte’s 31 Days of Drupal Migrations starter series, or watch Redfin Solutions’ own Chris Wells give a crash course training session. This blog series will cover more advanced topics such as niche migration tools, content restructuring, and various custom code solutions. See the first blog in the series Custom Migration Cron Job.
There are lots of tools built into Drupal 8 (D8) and Drupal 9 (D9) to assist with migrating from a Drupal 7 (D7) website. There is a whole suite of source and destination plugins that allow you to take data from any D7 node, file or user and migrate it into whatever D8 or D9 entity you want. But Drupal can’t account for every single data source you might have, so at some point in your migration you may hit a snag and need to write your own custom migration source plugin. Luckily, Drupal makes this straightforward.
If you don’t already have a custom migration module built, you can follow Mauricio Dinarte’s tutorial. Once you have that set up, go to your custom migration module and create the following nested folder structure for your custom source plugin:
your_custom_module/
├─ src/
│  ├─ Plugin/
│  │  ├─ migrate/
│  │  │  ├─ source/
│  │  │  │  ├─ CustomSourcePlugin.php
Then create a new PHP file in the source folder.
Now we can write our plugin. If you’ve never written a source plugin before, you can use the <a href="https://api.drupal.org/api/drupal/core%21modules%21node%21src%21Plugin%21migrate%21source%21d7%21Node.php/8.9.x">d7_node</a> source plugin for reference (this is the Drupal core source plugin for migrating nodes from a Drupal 7 database). Set up your namespace and underneath it add use Drupal\migrate_drupal\Plugin\migrate\source\DrupalSqlBase;. Then create a class that extends DrupalSqlBase with an @MigrateSource definition commented above it like so:
<?php

namespace Drupal\your_module\Plugin\migrate\source;
use Drupal\migrate_drupal\Plugin\migrate\source\DrupalSqlBase;

/**
 *
 * @MigrateSource(
 *   id = "custom_source_plugin",
 * )
 */
class CustomSourcePlugin extends DrupalSqlBase {
Note that your class name should be in CamelCase as usual, but the ID should be in snake_case. The ID is how you will reference your source plugin in a migration YAML file.
Inside your custom source plugin, you will need to create four public functions: public function query(), public function initializeIterator(), public function fields(), and public function getIds().
<br/>
<br/>
<strong>public function query()</strong>
Use this to query your source database (such as an old D7 website or whatever external database you are pulling data from). You will build your query using Drupal’s <a href="https://www.drupal.org/docs/8/api/database-api/dynamic-queries">Dynamic Query API</a>. In this example, I have a D7 website that uses an unlimited text field called field_footnote to add footnotes to a node. But in the new D8 website, I want each footnote to be its own entity, while making sure they each stay in the correct order on the correct page. This means I need to process footnotes one by one even though a single node can have several. I also need each footnote to know which node it came from and its order on the page, so the footnotes don’t get scrambled.
To handle this, the query is grabbing the “footnote” text field off all the nodes in the Drupal 7 source database with the entity_id, delta, and field_footnote_value fields selected:
$query = $this->select('field_data_field_footnote', 'f')->fields('f', [
  'entity_id',
  'delta',
   'field_footnote_value',
]);
$query->condition('entity_type', 'node', '=');
return $query;
This means that I process my old Drupal 7 field_data_field_footnote table row by row, turning each footnote into its own entity while keeping track of its parent (entity_id), order (delta) and value (field_footnote_value). This can be the trickiest step to get right because the whole source plugin depends on how the data is queried here.
<br/>
<br/>
<strong>public function initializeIterator()</strong>
<br/>
The initializeIterator function is necessary to run the query and start the iterator. All you need is:
$results = $this->query()->execute();
$results->setFetchMode(\PDO::FETCH_ASSOC);
return new \IteratorIterator($results);
If you need to set any constants for the migration, you can do that at this point as well: see <a href="https://api.drupal.org/api/drupal/core%21modules%21file%21src%21Plugin%21migrate%21source%21d7%21File.php/8.9.x">d7_file</a>. <br/> <br/>
<strong>public function fields()</strong>
<br/>
The fields function lets you state the queried fields from the source table and provide labels:
return [
  'entity_id' => $this->t('Entity ID'),
  'delta' => $this->t('Delta'),
  'field_footnote_value' => $this->t('Footnote'),
];
<strong>public function getIds()</strong>
<br/>
In the getIds function, you define which data field or fields will be used as unique identifiers. In my footnote example, multiple footnotes can be on the same node, so I need more than just the node ID to uniquely identify them. I also need to add the delta (the footnote’s order on the node).
return [
  'entity_id' => [
    'type' => 'integer',
  ],
  'delta' => [
    'type' => 'integer',
  ],
];
The entity_id and delta fields will get translated as sourceid1 and sourceid2 respectively in the migrate_map table. <br/> <br/>
That’s all you need to create your custom source plugin. Now you can write a migration to use it. Remember that in your migration YAML file you will use the @MigrateSource ID that you set in the comment above the class, not the class name.
If you want some extra credit, you can add a fifth public function, prepareRow. This allows you to make data manipulations on each row before it gets sent to the rest of the migration. If I wanted to set a character limit on my footnotes I could use prepareRow to trim or flag any footnotes that are too long. This can also be done as a hook in your module file, hook_migrate_prepare_row.
Custom Migration Cron Job

In November 2022 the Drupal community and the Drupal Security Team will end their support for Drupal 7. By that time, all Drupal websites will need to be on Drupal 8 to continue receiving updates and security fixes from the community. The jump from Drupal 7 to 8 is a tricky migration, often requiring complex data transformations to fit legacy content into Drupal’s new paradigm. If you are new to Drupal migrations, you can read the official Drupal Migrate API, follow Mauricio Dinarte’s 31 Days of Drupal Migrations starter series, or watch Redfin Solutions’ own Chris Wells give a crash course training session. This blog series will cover more advanced topics such as niche migration tools, content restructuring, and various custom code solutions.
There’s a certain leniency afforded to migrating content from an old Drupal 7 website to its new Drupal 8 rebuild. Preserving old content with all its outliers can be complicated and tedious. However, it is typically run only once in production then augmented and completed. Take notes for future migrations and move on. This leniency is not available for ongoing migrations that need to be run routinely to keep a website’s content up to date. This can be anything from a website's directory to up-to-the-minute news and events data where the data comes from outside the website and requires a custom migration. Here the code needs to work consistently and report errors gracefully.
To run these migrations on cron, there are a few different options. The easiest is to use a module like Migrate Cron Scheduler or Migrate Cron. Both of these allow you to quickly pick a custom migration to run on cron and choose its frequency. Migrate Cron Scheduler, however, allows the user to configure the “update” and “sync” flags on the migration import.
The "update" flag will update all previously imported entities. The "sync" flag will also remove any previously imported entities that are no longer in the source database, so that the source and destination are synchronized.
These modules also let you choose a migration group, so that the migration import will automatically respect migration dependencies. The downside is that any custom code that needs to be run in conjunction with the migration will have to be split into a different cron job, and there is no setting on these modules to run the migration at a certain time of day or at an irregular frequency.
For situations that require these additional features, install and configure the Ultimate Cron module. This is a powerful tool that can be used to fine-tune any cron job to an exact time and frequency. The combination of Ultimate Cron and a migration cron module will cover the majority of use-cases. However, if custom code or reporting is necessary immediately before or after the migration runs, then a custom cron job may be needed. To build this, go to your custom migration module and create a hook_cron function in the .module file. This file will need to use the following classes:
use Drupal\migrate_tools\MigrateExecutable;
use Drupal\migrate\MigrateMessage;
use Drupal\migrate\Plugin\MigrationInterface;
Exactly how you configure this hook will depend on your situation. For each migration that you want to run on this cron job, you will need to follow these steps. First create an instance of the migration plugin by feeding the migration’s id into the Drupal plugin manager:
$migration = \Drupal::service('plugin.manager.migration')->createInstance($migration_id);
Next, check the status of the migration. Often if there is an error, the migration will be hung in the “importing” state. Running a migration with the “importing” status will result in an error. To get around this, check the status and if necessary reset it to idle:
// Reset migration status.
if ($migration->getStatus() !== MigrationInterface::STATUS_IDLE) {
  $migration->setStatus(MigrationInterface::STATUS_IDLE);
}
At this point there are a couple options. You can leave the migration as-is and run a straight import where the content that has already been migrated will remain the same and any new content will be imported. Or set the “update” flag so that new content will be imported and existing content will be updated to match the source: $migration->getIdMap()->prepareUpdate();
Additionally, you can set the “sync” flag to remove any migrated content that no longer exists in the source database (e.g. an event that was cancelled). Note that this option requires at least migrate_tools version 5.
$migration->set('syncSource', TRUE);
Finally, create the MigrationExecutable plugin and run the migration:
$executable = new MigrateExecutable($migration, new MigrateMessage());
$status = $executable->import();
The “status” variable indicates whether the migration ran into any errors. If the status is empty, then there was an error and we can send a report and make custom adjustments to help the migration fail gracefully. Otherwise the migration ran fine.
Once the cron hook is ready, go to the Ultimate Cron jobs page (/admin/config/system/cron/jobs) and click the “Discover jobs” button. Your custom cron job should show up in the table, and you can click the “edit” button to fine-tune the exact timing. For updating or syncing migrations with hundreds of entities, the page may timeout if you manually hit the “run” button for your custom cron job. However, Ultimate cron version 2.x adds the drush commands cron-list and cron-run. Use cron-list to find your cron job id. Then use cron-run with that id and the “--force” flag to manually run your cron job for testing.
The Migrate Cron Scheduler or Migrate Cron module route is much faster to set up and is the better choice for quick, simple migrations that need to be run on the hour. However, for bigger, more complicated migrations that require additional code either immediately before or after the migration, or need to be run in the middle of the night, the Ultimate Cron module combined with a custom cron job provides the most customization and flexibility.
Writing Accessible Content in a Content Management System

Accessibility isn’t just a concern for web developers. With content being dynamically created, there are a few points content editors can keep in mind to make sure their content is accessible to everyone. Following accessibility standards helps non-visual users, but can also help all users find and understand the information they’re looking for.
Creating Emphasis
One of the most common times accessibility issues pop up is when content editors are trying to emphasize sections of text. It is important to keep in mind that screen readers do not recognize details like different colors or bolded text, but will intonate exclamation points. If it is vital to the understanding of the content that a certain sentence be highlighted, consider using an exclamation point. If it is not vital but may help visual users to better understand the message, your best bet is making use of bold.
From a usability standpoint, be wary of using color for emphasis. Colors can have unintended implications, such as causing the user to think the text is a warning, or even a link. Text also has to pass a certain color contrast ratio with its background to maintain accessibility, so unless a designer or developer with a knowledge of accessibility has picked out new colors for you, it’s best not to introduce more.
Another common mistake when emphasizing content is using all uppercase letters. A screen reader will read this out like an acronym, which could be particularly painful for a full sentence. Aside from screen readers, it is also shown to be less readable for all users when there are more than one or two words in a row in all-caps. Sometimes you’ll see all-caps used on buttons or labels, but the crucial difference is that these are (or should be) made into all-caps with code. A screen reader will usually ignore the css and see the text as it is originally written.
Is bold not enough variation for your content? Talk to your designer or developer about coming up with additional text styles for you to use. You may think to yourself, “I already have a dropdown with five different text styles I can use!” What you’re probably referring to is the heading selector.
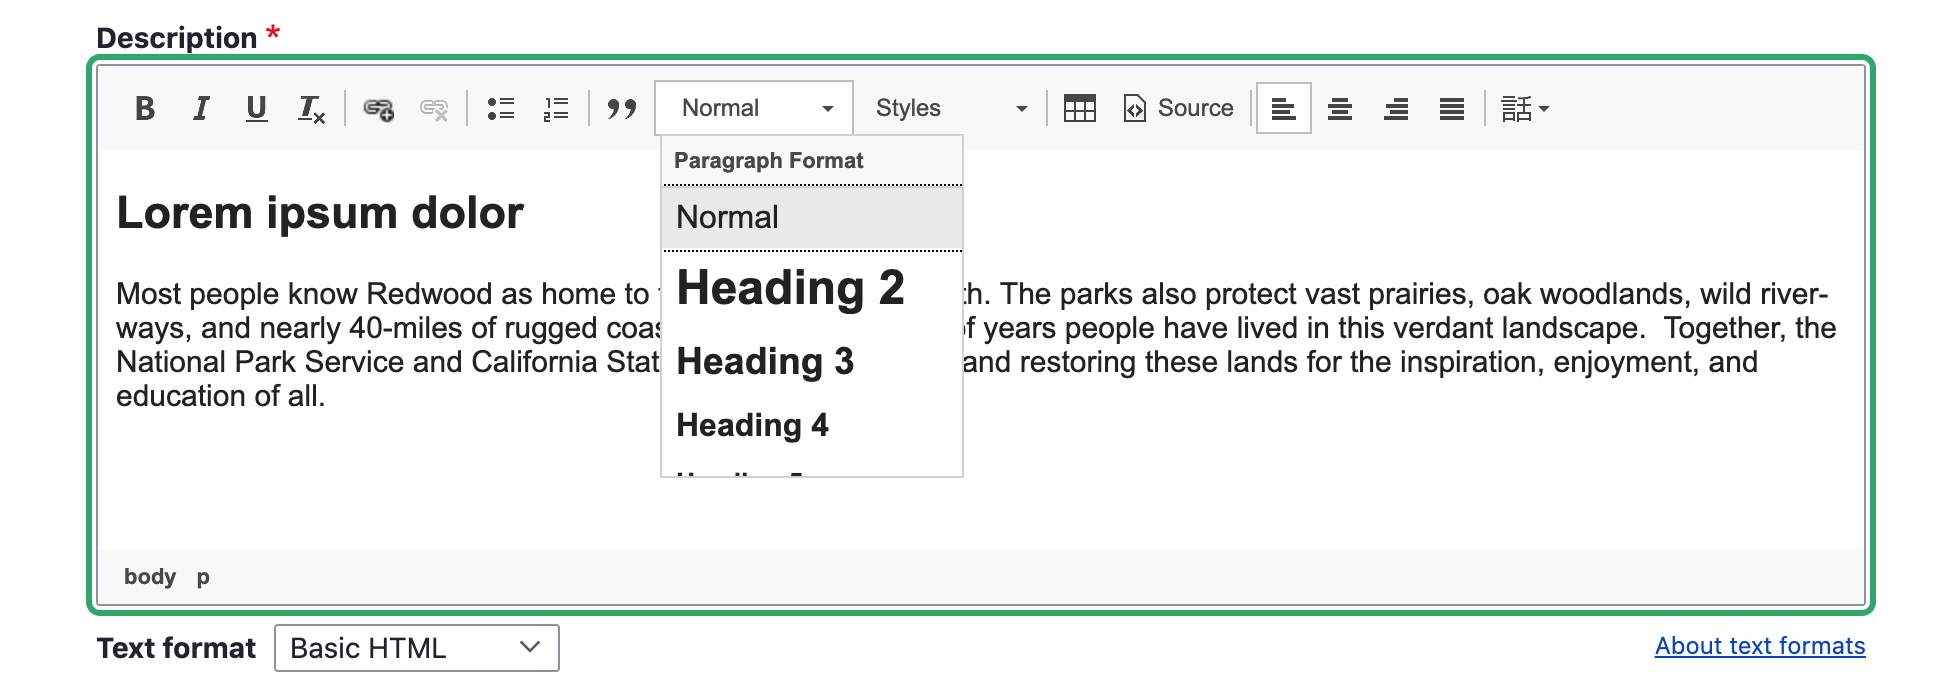
Headings should never be used for emphasis or a stylistic choice. They are a tool to add structure to a page.
Heading Structure
Headings are pieces of HTML that are used to give structure to a page. They make it possible for non-visual users to navigate and understand a page without needing to see visual indicators. There is a specific way headings need to be arranged on a page.
Headings are nested, just like you would see in an outline of a paper where subsections are indented and have a different bullet point or character. Heading 1 is the topmost level, functioning as the title of the page. There should only ever be one H1 on a page, and if you’re using Drupal or any other content management system, the H1 is probably already generated for you as the page title. If you’re working in a body field, for example, you’ll most likely start with H2 to title a section of content. Anything else at this same section level will also be an H2. If you need to label sections within this section, you can start to use H3’s. If you need to go any deeper than this, you can start to use H4’s, H5’s, and H6’s, but if you are going this deep into the structure, it may become difficult to follow for your average user. Here’s an example of heading structure:
(H1) The Most Amazing Chocolate Cake
(H2) My Grandmother’s History
(H2) Ingredients
(H3) Types of flour you can use
(H3) Alternative ingredients
(H4) Vegan alternatives
(H4) Gluten free alternatives
(H2) Instructions
(H3) The cake
(H3) The frosting
An important thing to watch out for is that heading levels don’t skip. You don’t want to go from an H2 right to an H4. That makes it more difficult for non-visual users to understand the structure of the page, and creates inconsistencies for all users. If you keep finding yourself tempted to do this for visual reasons, think about why it feels like the heading style available doesn’t fit, and work with your designer to figure out how best to fix it.
As mentioned before, don’t use headings simply to emphasize text. If you’re making a whole sentence into a heading, it’s probably not the right use. Headings are also not designed to be used for long sections of text. Bigger and bolder does not always mean easier to read. Sometimes a pull quote or a custom text style is an option that will accomplish what you’re looking for, without creating accessibility and usability issues, as well as design inconsistencies between different content editors.
Foreign Languages
Sometimes on your site you’ll need to add text in a different language. Visual users can identify when they won’t be able to read something, but screen readers need a hint that a sentence is in a different language. There’s a simple way to add this hint to your text: the language button. When you add content to a text field, usually you will have a toolbar at the top that allows you to make things bold, add a link, etc. One button that you may see if you’re using Drupal looks like this:
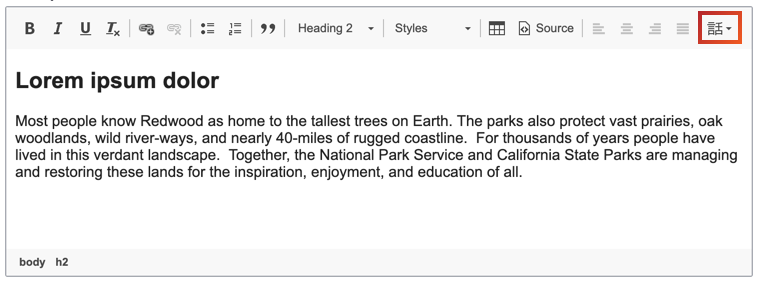
If you see this button, you can highlight your text and select from the dropdown. If you don’t see this button, or any buttons, ask your developer to make it available for that field.
Another thing to note with foreign languages is that users can use external tools to translate the content into a language they understand. For this reason, it is best to stay away from made up words that would only make sense in the language you’re writing, but not others (i.e. “hangry”).
Special Characters
One more content writing trend to avoid is replacing letters with characters, for example “$ave ₵ash” or “see u l8r.” This causes predictable issues for translation and screen readers, but it also can show up incorrectly for anyone. If you have an article titled “$ave ₵ash” it will show up in the url as something like this: yoursite.com/news/ave-ash, which could lead to some confusion when sharing links. The “u” in “see u l8r” would most likely be understood by a non-visual user, but would be impossible to translate.
Writing Accessible Links
Writing good link titles is important, and once you understand how non-visual users navigate a page, it’s easier to accomplish. These links could be inline links, such as a word in a sentence, or could stand alone, such as a button. Regardless, what you want is for link titles to be able to stand on their own. This is because one navigational tool that assistive technology provides users with is a list of links that appear on the page. Imagine a list of links that says “click here,” “learn more,” and “download.” These links don’t give the user any context or information about where the links will go. Instead, create links with text that gives users an understanding of what exactly that link will be doing. No user wants to waste time clicking on a link gives them an unexpected result.
W3.org gives these as examples of successful links (URI refers to the link destination):
A link contains text that gives a description of the information at that URI
A page contains the sentence "There was much bloodshed during the Medieval period of history." Where "Medieval period of history" is a link.
A link is preceded by a text description of the information at that URI
A page contains the sentence "Learn more about the Government of Ireland's Commission on Electronic Voting at Go Vote!" where "Go Vote!" is a link.
Meaningful link text also helps users tabbing through a page from link to link. Users can more easily navigate and determine where to go next without spending more time than wanted on an intermediary page.
Learn more about link accessibility at w3.org.
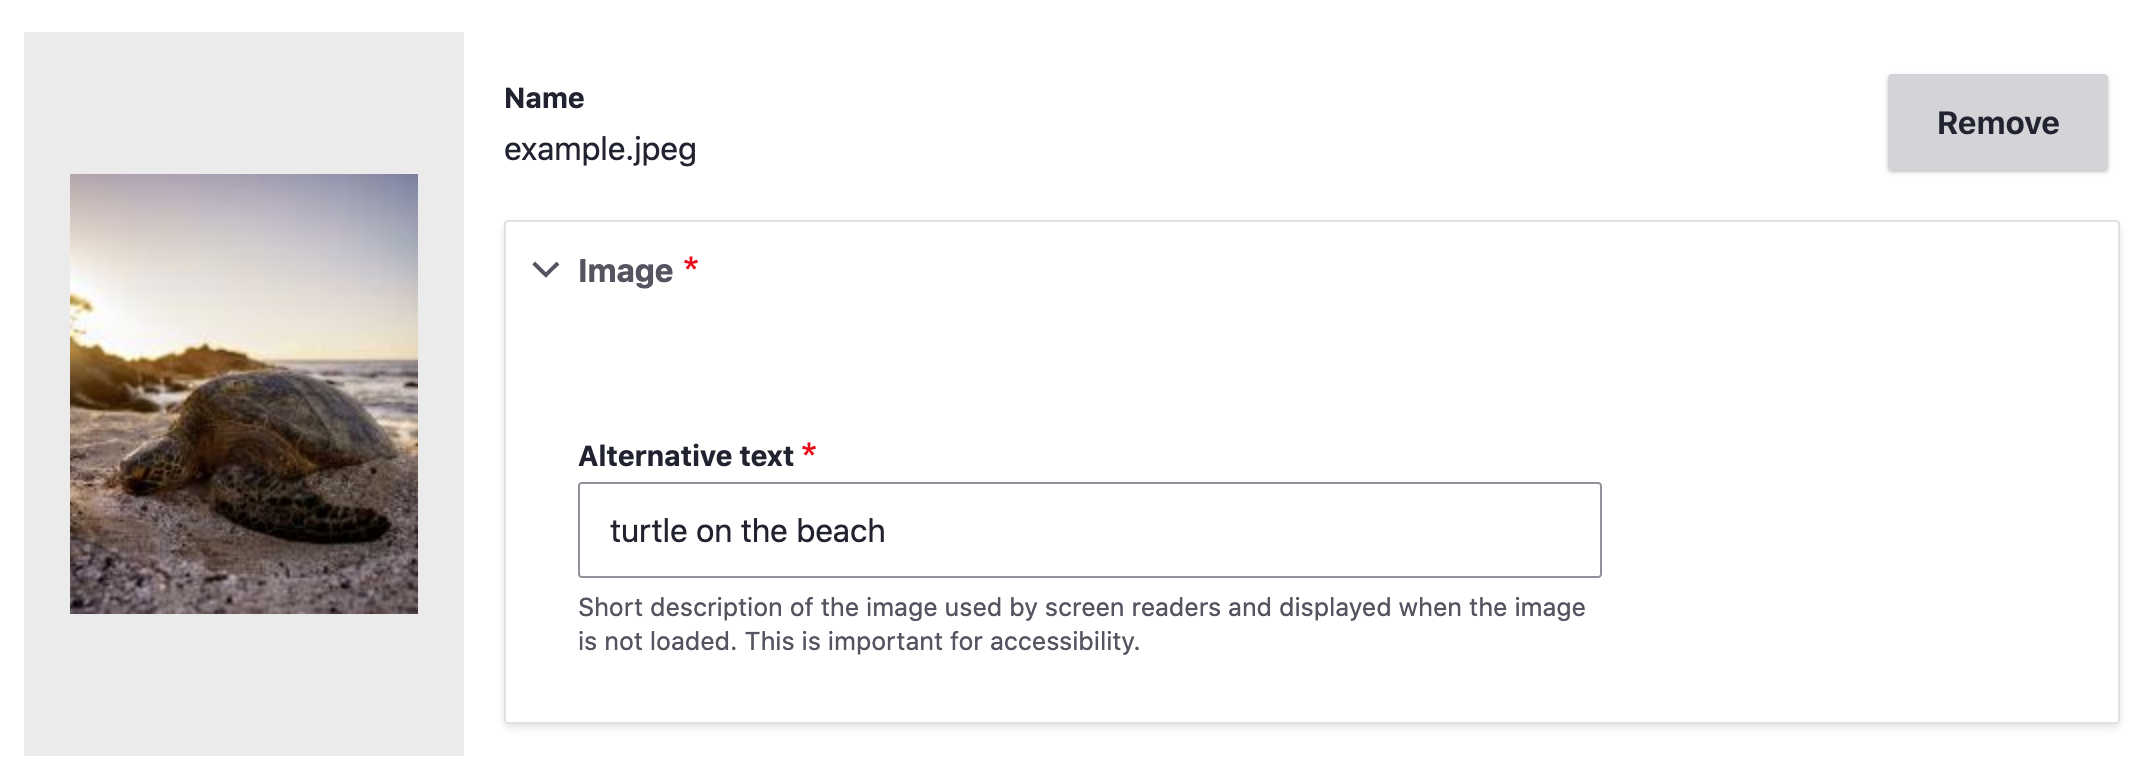
Writing Good Alternative (Alt) Text
Images that you add to your page need good alt text. When using a content management system, you’ll see a field show up when you add an image, asking for alt text. Alt text allows non-visual users to get the same basic information that the image is giving to a visual user. It is what shows if an image doesn’t load, whether because of a broken image link(?) or a user’s limited internet access. It also provides information to search engines.
Writing good alt text can feel a bit tricky at first. What you want is for your alt text to communicate the content and function of the image. Think of alt text as what you would want to appear in the place of the image if you couldn’t use it. You’ll want to be succinct in describing the image, and avoid any redundancy with the text around it. Screen readers will know that it’s an image, so don’t add text like “image of…” Think about what information is and isn’t helpful, and why you’re adding an image in the first place. Is it just to take up space next to text, or is there something important being conveyed through that image? An image of students on a quad conveys information about student life at the university, whereas a cartoon image of a backpack likely doesn’t add any information.
Sometimes the alt attribute of an image should be empty. The alt attribute is the piece of HTML that is holding the alt text you enter when you first add an image. You may instead have a label below your image that is visible to all and acts as alt text. You wouldn’t want a screen reader to read out what would ultimately be the same text twice, so you’ll want an empty alt attribute on the image. The only instance where you want no alt text at all is when an image is only decorative, such as a swirling line between text sections or a generic image added only to break up the text (like the previous backpack example). Alternative text may be a required field when you add an image, in which case adding empty alt text by typing a single space in the field might work for you. If this doesn’t work, you may want to talk to a developer about making alt text optional. Consider how many content editors your site has, and if they all have accessibility training. If it is possible that a lot of images that need alt text could end up without it, it may be best to keep it required and minimize using images that don’t add meaning to a page. If the image has alt text in a caption already and you need to add something into the alt text field to be able to save it, try to add context that isn’t already clear from the caption. In most cases you will want alt text anyway, but ask yourself if the alt text you’re adding will be a help or an unnecessary hindrance to a non-visual user.
When an image is linked, and is the only thing in the link, the alt text needs to describe the function of the link. This is because the link doesn’t have any other text in it, so any clue as to where the link is going to go is taken from the alt text. In this case, you can write alt text as if you were writing link text.
For some great examples of how to write alt text, take a look at the list provided by webaim.org.
Conclusion
Once you understand how different users are experiencing your content, writing with accessibility in mind starts to get easier. It’s not always the most exciting and creative part of writing content, but it can be a rewarding experience to continually remind yourself to think about users that often can be overlooked. Putting yourself in someone else’s shoes can help build empathy and make the web, and particularly your piece of it, a more positive space for all.
Creating a User-Centered Website

In response to the COVID-19 pandemic, the Redfin Solutions team has shifted to working remotely. Because of the nature of the pandemic, some of our clients have tight deadlines in order to get information out to people as quickly as possible. A recent client with a special need for a quick turnaround is the Rural Aspirations Project, a non-profit in Maine committed to connecting parents and educators with resources, support, and networking opportunities provided by trusted local organizations. When the schools closed, parents and educators’ need for help grew exponentially.
Rural Aspirations came to us with the idea for Community Learning for ME. The goal of this project was to create a tool for educators and families to find reliable resources specific to their needs. We knew that for this to be successful it was crucial to keep our focus on the user. At the same time, we had to finish the project within two weeks, including design and implementation, all while adjusting to the new normal of remote work.
User personas + User journeys
Our first step was to get acquainted with the user audiences. Luckily, those at Rural Aspirations are very connected with who their users are, as they work with them personally. In their documentation for the site, they had already included a mix of what we refer to as user personas and user journeys. These outline rough groups of people who will use the website, and the situation they might be in at that moment.
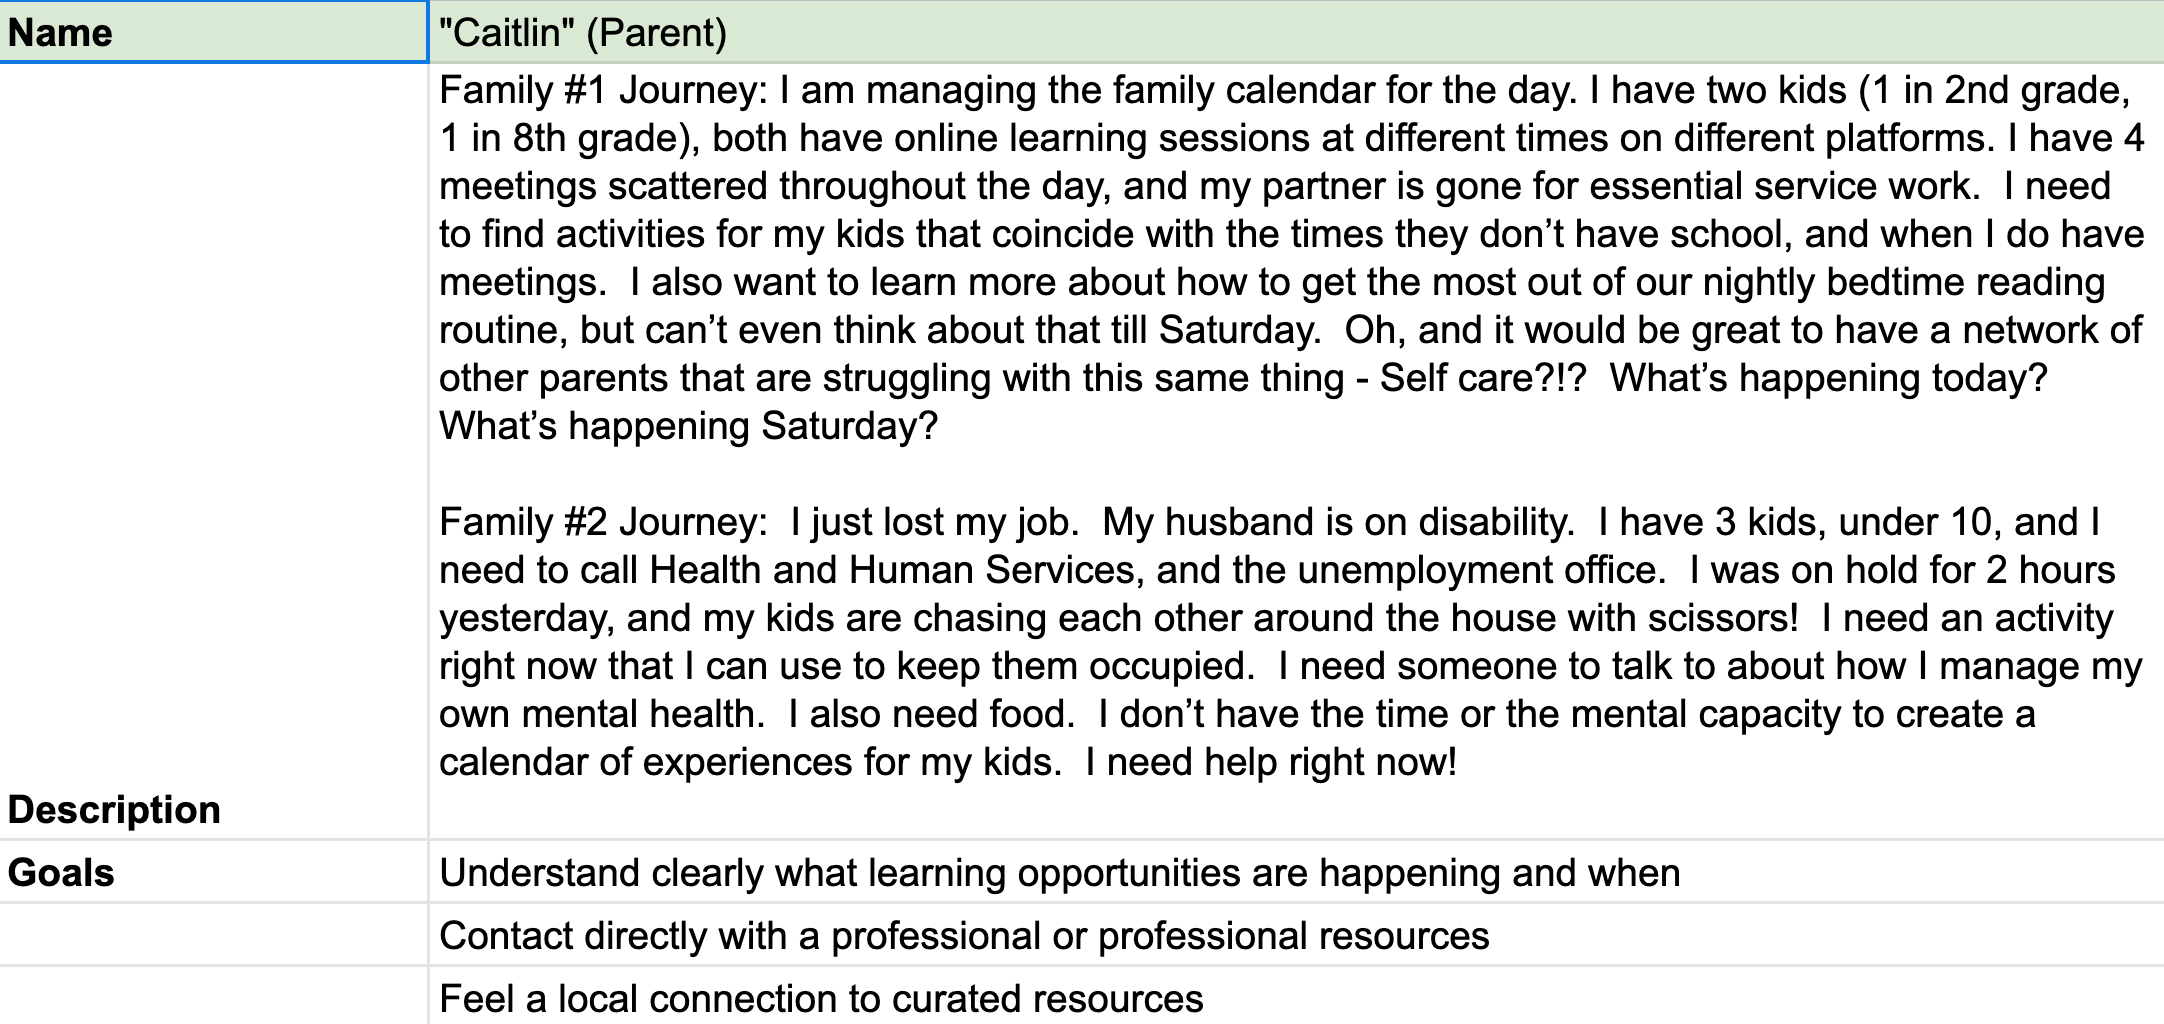
One of our user personas was Caitlin, a mom of two kids, one in second grade and one in eighth. Her partner is an essential service worker and she has a job where she has to be in meetings during the day. She is overwhelmed by work and childcare but wants to help her kids more.
Each persona allows the Redfin team to understand a little bit more about one type of person that might be using the site including basic information, the challenges they face, and their goals. We also wanted to understand how they might be using the site – the user journey. For instance, when Caitlin uses this site she wants to get to content for her kids quickly (she may be minutes away from an important meeting) and not have to spend time figuring out if it’s safe and quality content. She would also benefit from discovering that there are resources to help her, in case she wanted to come back when she has some time.
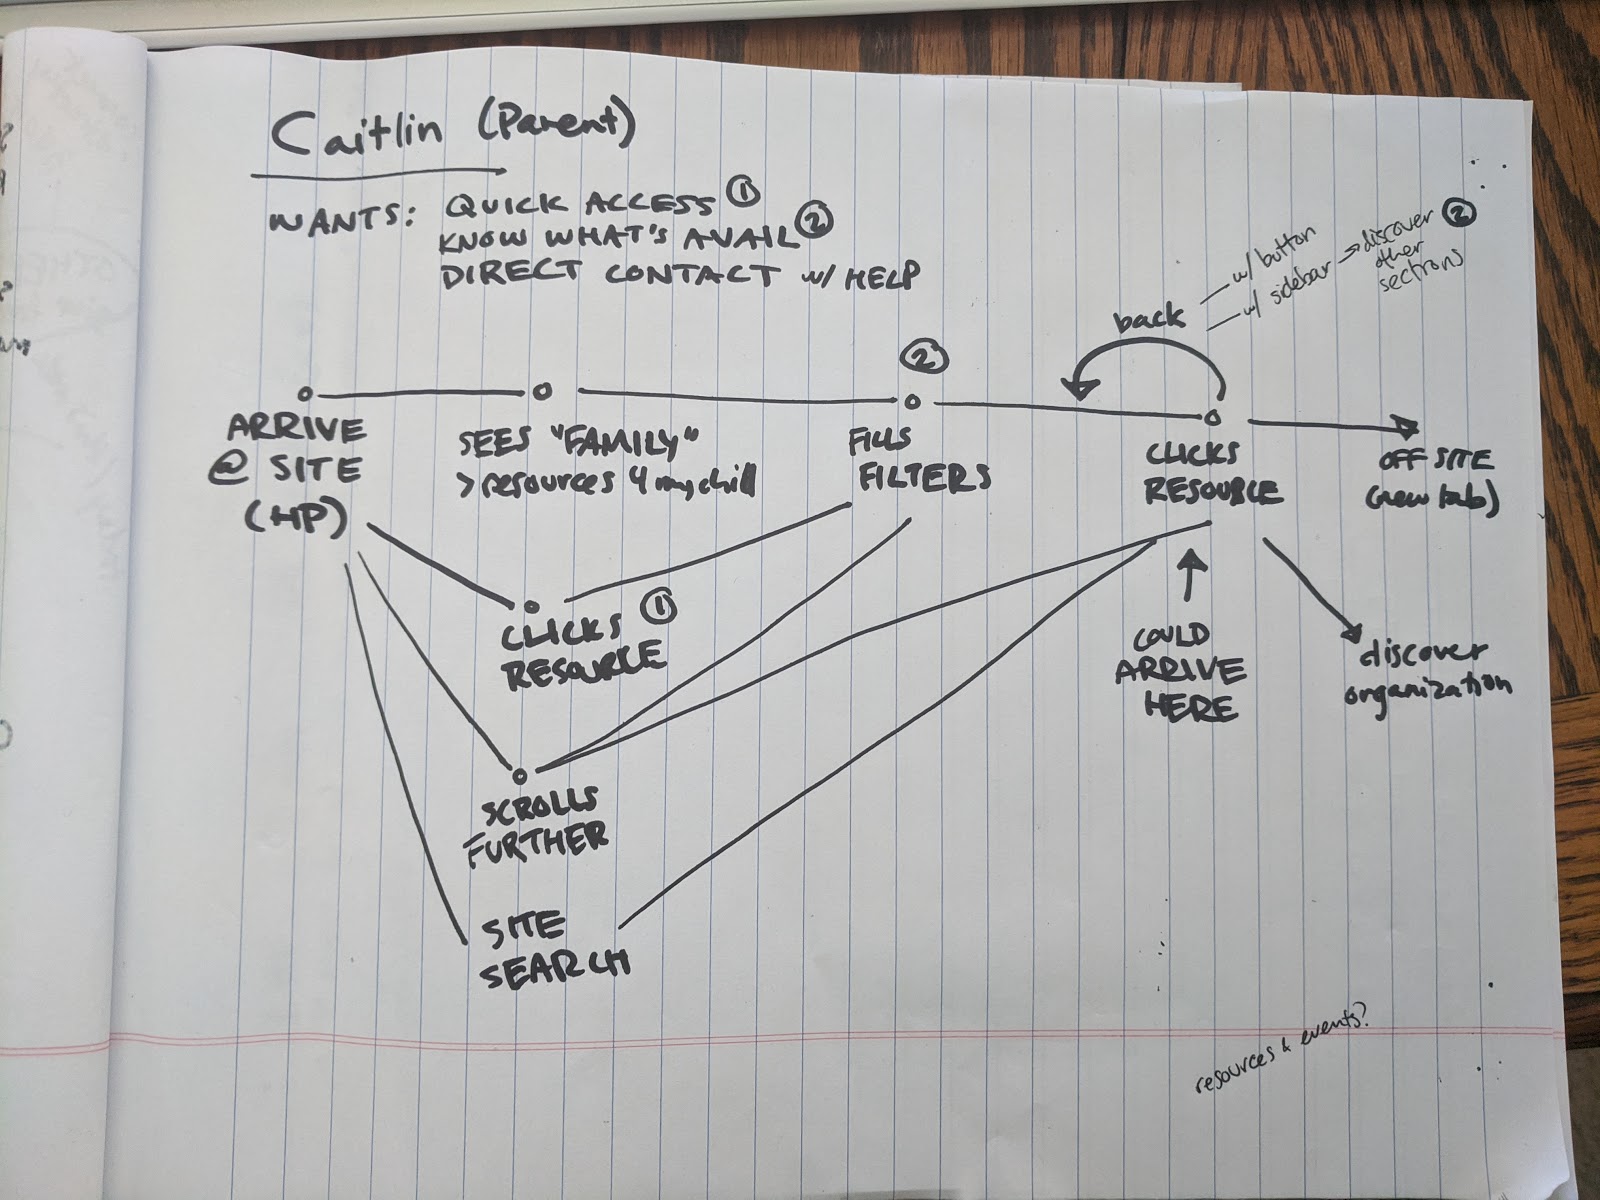
User flow
Once we started wireframing (the first step in the design process where we map out different pages the website will need), we decided we needed to look at the user flow. The main difference between a user journey and a user flow is that the user flow takes a closer look at how the user interacts with the product once they are on the website. We looked at the main entry points of the website: the homepage and an individual resource, taking into account the possibility of these resources being shared on social media. The challenge was to orient the user, and then create a balance of quick access and discovery. We provided several paths from the homepage to the end goal of finding a resource, and included those filterable resource landing pages as the primary links in the global navigation. From an individual resource, we provided a link back to the filter landing page in order to create a loop from the filtered page to the different resources until the user found the right one for them.
Wireframes, annotated designs, and building in Drupal
One of the user personas that Redfin Solutions always anticipates is a content editor, so we kept the user experience in mind even while building the administrator side of the website. We used Drupal to create a content editor experience focused on clarity and ease-of-use, as well as automation, so that Rural Aspirations could focus less on updating the website and more on their jobs. We also gave contributing organizations the ability to add and update their own resources, making use of Drupal’s user permissions to limit them as needed.
One aspect of this project that made it successful was having key members of the team included in every step. We started meeting with our clients with a lead developer, a designer, and a project manager. Later in the building process we would involve others, but having both a design and technical architect from the beginning and throughout the entire project was crucial. It ensured we didn't waste time designing features that couldn’t be built in time, and that features were prioritized and adjusted based on the users’ needs.
The Redfin team was also able to test out some of our design processes and add new ones to make the most of remote collaboration. We used Invision to annotate and share designs, and we tried out Invision’s live whiteboard tool Freehand for the first time to create and share wireframes. Since we’re used to working together on a whiteboard at the office, this helped us to avoid designing in isolation and get quick feedback from each other.
Rural Aspirations’ main concern is helping people through this stressful and overwhelming time. As we worked on this project we realized the logic of sorting through these resources would be complex, but that its success would depend on making it all look simple, thus removing any extra stress from the user. With more time to spend on this project our next step would be to test the success of this tool with google analytics and live user testing, but for now we have created calls for feedback throughout the site. In times of crisis it is particularly important to focus on users first and building sites that relieve burdens.
Leveraging Custom and Third Party Libraries in React Native: Part 3

This is the last in a series of blog posts about creating an app with React Native. To get started with React Native, read the Basics of React Native: Part 1. If you want to include content from a Drupal website in the app, read Integrating Content with React Native: Part 2.
It’s almost impossible to build a professional app without including third party or custom libraries. Using libraries where and when they’re needed upholds the tenant of reusability that React Native sets forth. It saves time and money by reusing code that already exists. There are only three steps to include a library in a React Native project:
- Install the library with npm (node package manager)
- Use ES6 (ECMAScript 6) import statements to import whatever components are needed from the library.
- Implement the components within your component or screen.
Here is an example of how to include a library like GooglePlacesAutocomplete in a React Native app. Install the library using:
$ npm install react-native-google-places-autocomplete
Import components from the library wherever they are needed using:
$ import {GooglePlacesAutocomplete} react-native-google-places-autocomplete
Finally, implement the component within the file by calling on it like any other component:
<GooglePlacesAutocomplete placeholder='Enter Location' minLength={2} autoFocus={false} returnKeyType={'default'} fetchDetails={true} currentLocation={false} />
Leveraging your own components is even easier than leveraging components from libraries. In order to include a custom component, use ES6 import statements to import your components, and implement your components within your component or screen. A common place to store these custom-built components is within a project’s components directory. To use a custom component like CustomComponent.js inside a screen include: import CustomComponent from '../components/CustomComponent' at the top of the file, and <CustomComponent /> when you want to use the component.
Libraries enforce code reusability standards because they encourage writing a piece of code only once and implementing it anywhere else it is needed. Your project will be more organized and easier to expand upon later because this method enforces proper library use. It also saves you from wasted time and headaches down the line because your libraries won’t look like spaghetti when you come back to them months later.
We hope you enjoyed this series about creating an app with React Native. Comment below to share what you found useful or more tips that we missed. For updates on new blog posts, our work, and more, like and follow us on Twitter, Facebook, LinkedIn, and Instagram.
Integrating Drupal Content with a React Native App: Part 2

This is the second of three of blog posts about creating an app with React Native. To get started with React Native, read the Basics of React Native. Once you are familiar with the system and have an app, it is time to fill it out with content. If you don’t have content on your Drupal website, read Understanding Drupal 8’s Migrate API.
Exposing Drupal content
Some helpful modules to expose Drupal content are: Views, RESTful Web Services, and Serialization. The concept of getting Drupal content to an endpoint is simple:
- Build a view containing the data you want to expose.
- Add a “REST export” display to the view. During this step, select the appropriate serialization type.
- This will automatically create a REST endpoint at the URL.
The dataflow should look something like this: Drupal Content -> View -> Serializer -> REST endpoint.
Using fetch to asynchronously retrieve data
React Native’s compiler is Babel, which means ES6 code can be used anywhere in the project. This is useful for retrieving data, because ES6 enables the async and await keywords. When used in conjunction with something like fetch, you can create a smooth and elegant solution for pulling data from a server, such as content from a Drupal website.
The code for pulling from a Drupal website REST endpoint is the same as REST endpoint. It should look something like this:
async getSomeData() { let url = "https://data.org/useful/data"; let response = await fetch(url); let data = await response.text(); return data; }
The advantage to making a call like this asynchronously is that it allows other threads to continue running while the fetch is waiting for the server call to return with all of the data it ordered. This improves the user experience because it allows them to continue using other functions while the data loads.
Building a FlatList from a data set
After pulling in data from the endpoint, add a component to display the data. <FlatList> is an excellent component already built in to React Native. These components are useful because they could handle infinite amounts of data without impacting performance, since they only render the part of the list that is currently on screen.
A <FlatList> component takes two props for displaying data. You may need to massage the data to make it easier to use inside a <FlatList>. The first prop is the set of data that it will display. The next prop required by a <FlatList> is renderItem, which describes how the data should be displayed. This is a JSX object that tells the <FlatList> component how to represent each list item, and what fields to pull from the data. You can use any component inside renderItem.
The ListItem component provided by React Native Elements has lots of styling features, like color gradients and automatic chevron placement.
Here is an example <FlatList>:
<FlatList> style={{backgroundColor: '#ededed'}} data= {this.state.peopleData} renderItem={({person}) => <View> <ListItem title={person.name} titleStyle={{ color: '#00AEED', fontWeight: 'bold' }} subtitle={person.position} /> </View> } />
With the skills to expose, retrieve, and display your data, you can integrate a Drupal website with your new React Native app.
Basics of React Native: Part 1

Redfin Solutions started using React Native in early June when a client needed an app that could integrate with their Drupal website. Since it was our first project with React Native, we recorded useful information to share with the rest of the team. This is the first in a series of three blog posts that will cover what we learned and what we found the most useful while using React Native.
Expo & React Native CLI
There are two main framework options for building a React Native app: React Native CLI and Expo.
React Native CLI is the option most people from a native app development background choose because it trades a streamlined workflow for the ability to add native modules written in Java or Objective-C.
Expo is easier for people from a web development background because it provides a streamlined workflow to those who don’t need to link native modules to their app. It comes with integrated libraries, a client app for development, and it doesn’t require Android Studio or XCode to build the project for Android and iOS separately. With a signing key, Expo handles the building process. This speeds up the development process and frees up time to spend on new features for the app.
Components
The React Native design philosophy separates each screen into a hierarchy of components. At the lowest level are simple components like <Text>. Larger components are constructed out of other smaller components. They can also be designed as a specific case of another component. For example, it may be simpler to create a <HelloWorld> component that is a more specific version of the <Text> component if you are repeatedly creating <Text>Hello World!</Text>components.
Props & State
Every component has two stores of data that contain information about itself, props and state. Props are the parameters of a component. It is primarily set when the component is created. For example, the URL of an image component is passed in when it’s created and stored in props.
Conversely, state is used to store data that changes. When state changes, the component is re-rendered to show the change. For example, the current value of a volume slider might be stored in state.
JSX
JSX is a syntax extension for JavaScript that comes with React Native. It is a simple way to express how the React Native components should be rendered into elements on the screen. JSX is intuitive because it functions within React Native that same way HTML functions in a webpage. Take a look at this JSX for putting text and an image on a screen:
<View> <Text> Hello World! </Text> <Image source={require('../assets/images/hello.png')} /> </View>
Lifecycle API
Every component follows a lifecycle API. This is a set of methods that React Native calls during certain events in a component’s life. The only required method, besides the constructor of a component, is the render() method, which expresses how to render the component on the screen by returning React elements that are usually defined by JSX.
Styling
Styling in React Native is similar to CSS. Every component can be styled with a StyleSheet prop, which is a set of CSS-style selectors passed inside of a JavaScript object. They even support Flexbox. For example:
const styles = StyleSheet.create({ header: { fontWeight: 'bold', fontSize: 30, }, });
And when you want to apply it to a component: <Text style={styles.header}> Hello World! </Text>
To see all the style options available, check out the documentation for each component.
React Navigation
It is easier to start app designs at navigation by planning out what each screen will contain and how to navigate between them. This top-down approach prevents context switching between screens while writing.
React Navigation, one of Expo’s integrated libraries, provides tools for creating a navigation system within React Native. Choose the ‘tabs’ option when initializing the project, and Expo will build a simple navigation system.
A StackNavigator is a good way to control screens because it allows them to remain concurrent when swapping between different screens. Each screen will retain its information.
To learn more about technical details check out the React-Navigation Docs.
Building Screens
To create a simple, static screen, you don’t need many moving parts because React Native provides robust components for these already. For example, components like <ScrollView>, <Image>, <Text>, and <Linking> can do most of the lifting on a page that only has to display information and images. A simple screen might look like this:
import React from 'react'; import { ScrollView, StyleSheet } from 'react-native'; export default function HamsterScreen() { return ( <ScrollView style={styles.container}> <Text> Your mother is a hamster! </Text> <Image source={require('../assets/images/hamster.png')} /> </ScrollView> ); } HamsterScreen.navigationOptions = { title: 'Hamster', }; const styles = StyleSheet.create({ container: { flex: 1, paddingTop: 15, backgroundColor: '#fff', }, });
This is just the beginning of learning how to use React Native. Keep an eye out for our upcoming blog post about using React Native with Drupal. In the mean time, watch Designing an App with Drupal and React Native, a Design 4 Drupal session presented by our summer intern developer, Jacob Morin.
The Meaning of Google Tag Manager's Non-Interaction Hit Events

When adding custom Analytics events via Google Tag Manger, make sure to set "Non-Interaction Hit" to "True" if you don't want that event to count towards the bounce rate. Otherwise, if the event fires on a page, GA will think you didn't bounce and subsequently set that session's page bounce rate to 0.
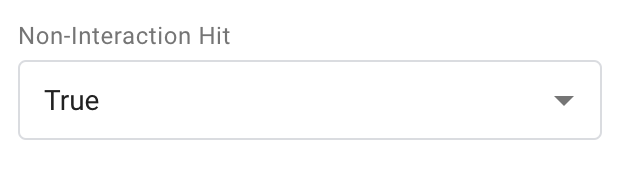
The default behavior for Google Tag Manager (GTM) events is for Non-Interaction Hit = False. This is because, normally, if a user is triggering an event on a page, it would imply they are interacting with the page and thus you would not want that to count as a bounce if the user ended their session shortly after.
However, if you set your event to fire on every page automatically (e.g., on page load) you likely would not want that to count as an interaction. In this scenario, you're best to set Non-Interaction Hit = True.
Please note that setting this to True also affects time on page calculations. If Google has no other hit events to go by, it may have a more difficult time calculating time on page. A "bounce" is a session containing only one interaction hit.
More information can be found at Google Analytics.
Embedding a React App in a Drupal 8 Site

Lots of people in the Drupal community are eager to learn React these days, following Dries's announcement that React is coming to Drupal.
At NEDCamp in 2018 I presented on how to dip your toe into embedding a react application into a Drupal framework (video on drupal.tv).
This is the long-delayed blog post to follow up to the presentation.
Our approach was fundamentally this:
- we wanted to possibly embed multiple React apps on the site eventually, so we wanted to treat our base React libraries as common across the site.
- we needed to marry React routing and Drupal routing so that we could occupy a whole "namespace" of the site
- we wanted Drupal to store all the entities managed by the front-end, so we had to settle on storage and an API
React Libraries
We wrote a small react_libraries module to expose the libraries for React that we thought we would use everywhere and wanted consistent on every site.
Besides the .info.yml file for the module, the only other thing in the module is the libraries' definitions.
# react_libraries.libraries.yml react: js: https://unpkg.com/react@16/umd/react.production.min.js: external: true https://unpkg.com/react-dom@16/umd/react-dom.production.min.js: external: true react-dev: js: https://unpkg.com/react@16/umd/react.development.js: external: true https://unpkg.com/react-dom@16/umd/react-dom.development.js: external: true
All this does is suck in the libraries from CDN, including a prod (react) version and a dev (react-dev) version.
Our smaller apps just depend on this module and then attach the react_libraries/react(-dev) libraries as needed (you'll see that next).
One lesson learned is that we started with create-react-app, so to make this work we had to eject from that and remove the libraries that are normally in the build app bundle. Next time, we will build our app up from scratch rather than using the scaffolding.
Routing
The way React apps work is that they handle the routing by changing the URL with JavaScript and allow the app to deal with what to do given that route. But, as the page isn't refreshing, it's all just one path to Drupal. The problem comes in when a user bookmarks a URL and expects it to work (and it should). To handle this scenario, we assumed a 'namespace' in the routing by declaring /my-react-app/* to belong to our React app. In Drupal 7, this would've "just worked," as any path registered auto-assumes that anything appearing on the URL after that are just arguments to the route. In Drupal 8, this is no longer true, so we have to sort of fake that old behavior.
To do that, we need a custom module. As part of that module, we can define routing--and we tell our route that there is a single argument passed ({react_route}), and we set the default value of that parameter to "" if it is not passed at all (i.e., you navigate to /my-react-app by itself).
# my_react_app.routing.yml my_react_app.overview: path: /my-react-app/{react_route} defaults: _controller: \Drupal\my_react_app\Controller\MyReactAppController::overview _title: 'My React App' react_route: ''
But, alas - this does not match the path /my-react-app/pathpart1/pathpart2 - so this is not complete yet.
Next, we need to create an Inbound Path Processor, by dropping a new class in our module's src/PathProcessor/ folder.
namespace Drupal\my_react_app\PathProcessor;

use Drupal\Core\PathProcessor\InboundPathProcessorInterface;

use Symfony\Component\HttpFoundation\Request;

class MyReactAppPathProcessor implements InboundPathProcessorInterface {

  public function processInbound($path, Request $request) {
    if (strpos($path, '/my-react-app/') === 0) {
      $names = preg_replace('|^\/my-react-app\/|', '', $path);
      $names = str_replace('/',':', $names);
      return "/savant-tools/$names";
    }

    return $path;
  }
}
What the above code does is strip out the "namespace" part of our route, and then replace all the forward-slashes with colons so that it appears as a single route parameter. Essentially, PHP is just throwing this out anyway, since it's the front-end that will be using this route information in JavaScript.
The Controller
The final missing piece is - well, what DOES Drupal actually serve up for markup when we hit anything at my-react-app/*? That's defined by the Controller that your routing.yml file refers to. Your routing class gets dropped in your module's src/Controller folder.
<?php
namespace Drupal\savant_tools\Controller;

use Drupal\Core\Controller\ControllerBase;

/**
 * Controller for My React App.
*/
class MyReactAppController extends ControllerBase {

  /**
   * Renders the react app.
   * @return array
   * The render array.
  */
  public function overview() {
    $build = [];

    // @TODO - do dev / prod here. (/react or /react-dev)
    // Ideally, make this configurable somehow.
    $build['#attached']['library'][] = 'react_libraries/react-dev';

    // This is where you attach the additional library from your
    // module that contains the non-React-libraries code
    $build['#attached']['library'][] = 'my_react_app/actualapp';

    // Finally, drop your main mount point for React.
    // This ID can be whatever you use in your app.
    $build['#markup'] = '<div id="root"></div>';

    return $build;
  }
}
Fin!
At this point, you're now free to write that whole slick frontend!
One last thing to mention, another alternative to this is to mount a React application onto a node. Using JD Flynn's module React Mount Node you can simply specify a node, the div ID, and the library you've registered with your React App in it. You will need React fully bundled, or you'll need to attach your react_libraries on every page or through some other mechanism, and the routing isn't handled with as much elegance - but if you have simpler needs, this is a great way to go!
How to Override CKEditor Build Config in Drupal 8

Drupal 8 ships with a custom CKEditor build. This build is configured with a build-config.js file. We recently ran into a situation in which we wanted to override this configuration in order to disable a plugin. There is some information in this build-config.js file about replacing it with a non-minified build for development purposes, but nothing about overriding it. Here is how we did it.
The plugin we wanted to disable was the <a href="https://ckeditor.com/cke4/addon/showborders" target="_blank">Show Table Borders</a> plugin. This is the feature that provides default dotted borders around all table cells while you're editing a table in CKEditor. We wanted to disable that and, instead, just show the table borders as they would be styled on the front-end. Upon inspection of the build-config.js file that Drupal uses, which is located at core/assets/vendor/ckeditor, we found that the plugins key contained showborders: 1. To disable it, we needed to rebuild CKEditor with this line removed.
To do that, we saved a copy of build-config.js to our theme in a similar location: assets/vendor/ckeditor. We removed the line which enables showborders. Then, we went to CKEditor's online <a href="https://ckeditor.com/cke4/builder" target="_blank">Builder</a> and used the Upload build-config.js feature to download a newly generated copy of CKEditor that would exclude the Show Table Borders plugin. We placed the downloaded files in our theme's assets/vendor/ckeditor directory.
The last step is to override Drupal's core CKEditor build from within the theme's info.yml file. Add the following lines (modified for your theme):
libraries-override: core/ckeditor: js: assets/vendor/ckeditor/ckeditor.js: /themes/custom/YOUR_THEME_NAME/assets/vendor/ckeditor/ckeditor.js
Flush the caches and the plugin should be gone!